
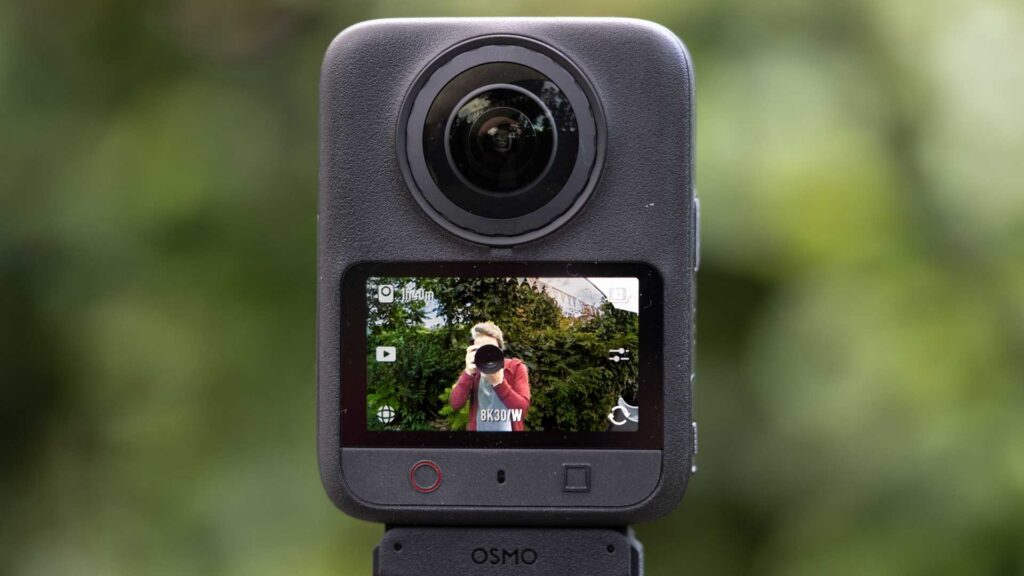
The DJI Osmo 360 II brings several useful upgrades on the original Osmo 360, with 8K/60p 360 video and user-replaceable lenses among the headline changes. There are also improvements to dynamic range, low-light shooting, slow motion and the editing workflow, while the body remains the same size and weight as its predecessor.
In use, standard 360 video looks very good and DJI Studio makes it easy to find the view you want afterwards. Spotlight Follow also works well and reduces the amount of reframing required. The 105GB of built-in storage isn’t new, but it remains a very useful feature.
I’ve used plenty of action cameras over the years, but the Osmo 360 II has quickly become one of my favourite fun video cameras. It makes me want to shoot more, try unusual viewpoints and take it on trips where a conventional camera might feel like too much effort.
The DJI Osmo 360 II is a compact 360-degree camera designed to capture everything around it so you can choose the final viewpoint afterwards. It uses two ultra-wide lenses and a square 1/1.1-inch CMOS sensor with an f/1.9 aperture to create a full 360-degree image field. DJI refers to this as 1-inch 360-degree imaging because the square sensor is designed to make more efficient use of its imaging area.
That ability to record in every direction is the big attraction of a 360 camera. Instead of having to keep the camera pointed precisely at your subject, you can concentrate on what you’re doing and sort out the framing later. It means one clip can give you a view of yourself, whatever you’re looking at, and the action happening alongside you.
There is a trade-off, of course. Capturing everything gives you more freedom while you’re shooting, but it can also mean a bit more faff when you sit down to edit. You have to decide which section of the 360-degree view you want to show and, in some cases, move that viewpoint as the action develops. DJI has added tools such as Spotlight Follow and Dual Recording to ease some of that pain.
I still have another small hurdle to get over with 360 cameras. I feel a bit of a lemon walking around a public place with a camera on the end of a long pole. In reality, most people probably don’t give it a second thought, but it takes a little getting used to.
The Osmo 360 II follows DJI’s original Osmo 360 and the two cameras have a lot in common. They share the same 61 x 81 x 36.3mm dimensions, 183g weight, 1/1.1-inch square sensor format, f/1.9 aperture and 105GB of usable internal storage. The new camera increases the maximum 8K 360 video frame rate from 50 to 60 frames per second and DJI quotes 14.5 stops of dynamic range compared with 13.5 stops for its predecessor.
The user-replaceable lenses are another headline change. A 360 camera’s lenses are very exposed by necessity, so knowing that a scratched or damaged lens isn’t necessarily the end of the camera makes the Osmo 360 II much more practical for travel and outdoor use.
Read our DJI Osmo Pocket 4P Review
The DJI Osmo 360 II Standard Combo is priced at £509 in the UK and from €589 in Europe, while the Adventure Combo costs £639 or from €739. DJI says UK and European availability will be announced later in September 2026.
DJI is also introducing several accessories for the camera. The Osmo 360 II Lens Replacement Kit contains two lenses and costs £35 or from €39. The Battery Extension Rod is £89 or from €99 and the Osmo Heavy Duty Clamp Kit is £39 or from €49. Pricing and availability for the Invisible Waterproof Case will be confirmed later.
The price of the Lens Replacement Kit seems fairly reasonable to me. I’d obviously rather not damage a lens in the first place, but 360 cameras are often used in situations where they’re more vulnerable than a normal camera. They get attached to selfie sticks, bikes, clamps and all sorts of other supports. The lenses are also vulnerable when you put the camera down between takes, especially if you don’t have the lens protector to hand, because they protrude from both sides of the body. So it’s reassuring to know that a damaged lens can be replaced.
Read Our DJI Mic Mini 2 Review
The core of the DJI Osmo 360 II is its 1/1.1-inch square CMOS sensor and f/1.9 aperture. DJI says the square design increases sensor utilisation by 25% and gives the same 360-degree image field as a traditional 1-inch rectangular sensor. The camera can record 360 video at up to 8K and 60 frames per second, while DJI quotes a maximum dynamic range of 14.5 stops.
That extra dynamic range should be useful in the sorts of situations we encounter all the time when travelling or photographing outdoors, such as walking from shade into bright sunshine or shooting with a bright sky above a darker landscape.
Low-light shooting is another area that DJI has addressed. The Osmo 360 II has AI (Artificial Intelligence) SuperNight 2.0, which uses an updated noise reduction algorithm to produce cleaner footage in darker conditions. DJI also supports 10-bit colour and D-Log M across its video formats, giving anyone who wants to grade their footage more colour information to work with.
The slow motion options are quite extensive. The Osmo 360 II can shoot 4K 360 footage at up to 240 frames per second, while DJI Studio can use frame interpolation to create up to 64x slow motion. There is also an 8K Vortex mode at 120 frames per second.
If timelapse is more your thing, the Osmo 360 II can create 16K 360-degree time-lapses, giving you plenty of resolution to play with when you choose the final framing. Still images can be captured at 120 megapixels with HDR (High Dynamic Range), which again gives you the option to capture everything and decide on the composition afterwards.
DJI has also introduced AI High Precision Smart Stitching, which is intended to reduce visible joins and alignment errors when subjects pass from the view of one lens to the other. Stitching is one of those things you don’t really notice when it’s working well, but it becomes very obvious when it isn’t.
Spotlight Follow is more immediately useful. It lets you select a subject and asks the software to keep that subject in the centre of the reframed video. This means you don’t have to manually move the viewpoint throughout the clip.
Dual Recording is another clever option because it can produce front-facing and selfie views from the same 360 recording. That could be particularly handy for solo travel, family trips and behind-the-scenes content where you want to show both yourself and what you’re looking at.
There’s also NFC (Near Field Communication) for connecting the camera to the DJI Mimo app. DJI says a tap can connect the camera, transfer footage or take you directly to the editing section of the app. Meanwhile, footage exported through DJI Studio can be used with DJI’s plugin for DaVinci Resolve.
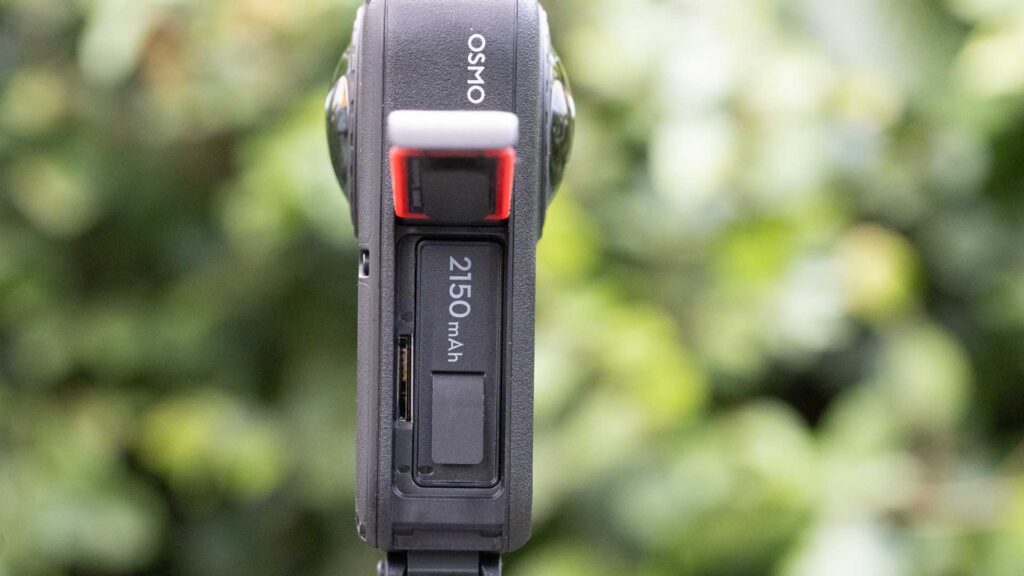
Like the original Osmo 360, the Osmo 360 II has 105GB of usable built-in storage. This means you don’t have to have a microSD card installed before you can start recording. It also uses a 2150mAh battery and DJI quotes a recording time of 100 minutes at 8K and 30 frames per second.
DJI says the battery can be charged to 80% in 22 minutes, while the optional Battery Extension Rod can add a claimed 180 minutes of runtime.
The camera is waterproof to 10m without a housing and has a quoted operating temperature range of minus 20°C to 45°C. DJI is also producing an Invisible Waterproof Case that allows the camera to be used down to 50m.
Read Our DJI Osmo Pocket 4 Review
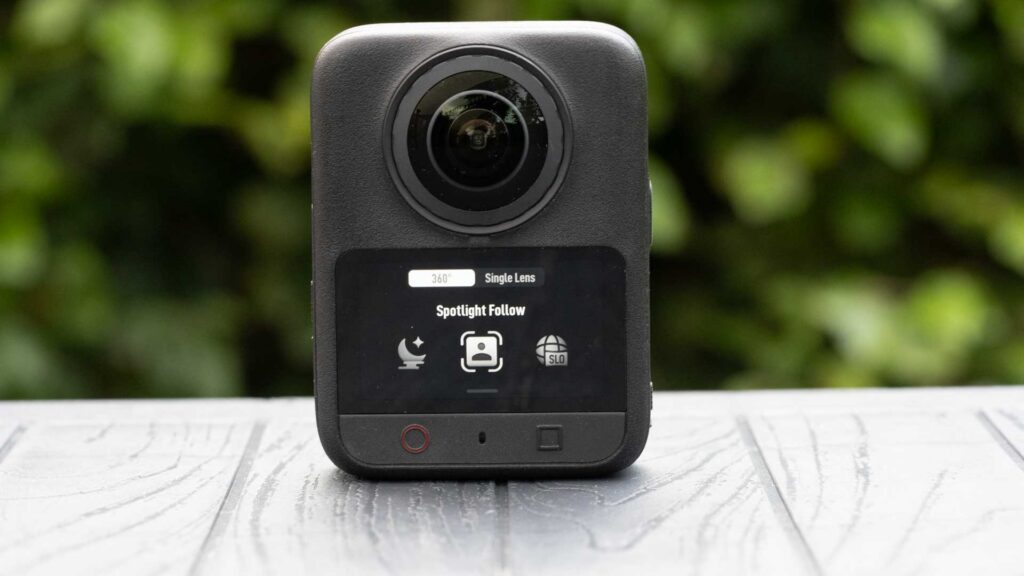
The DJI Osmo 360 II measures 61 x 81 x 36.3mm and weighs 183g, so it’s the same size and weight as the first Osmo 360. That’s good news if you’re carrying it as an additional camera alongside your usual photography kit. As a female photographer, I’m always conscious of how quickly the weight of a bag builds when you add another camera, lens or accessory, so 183g is easy to accommodate.
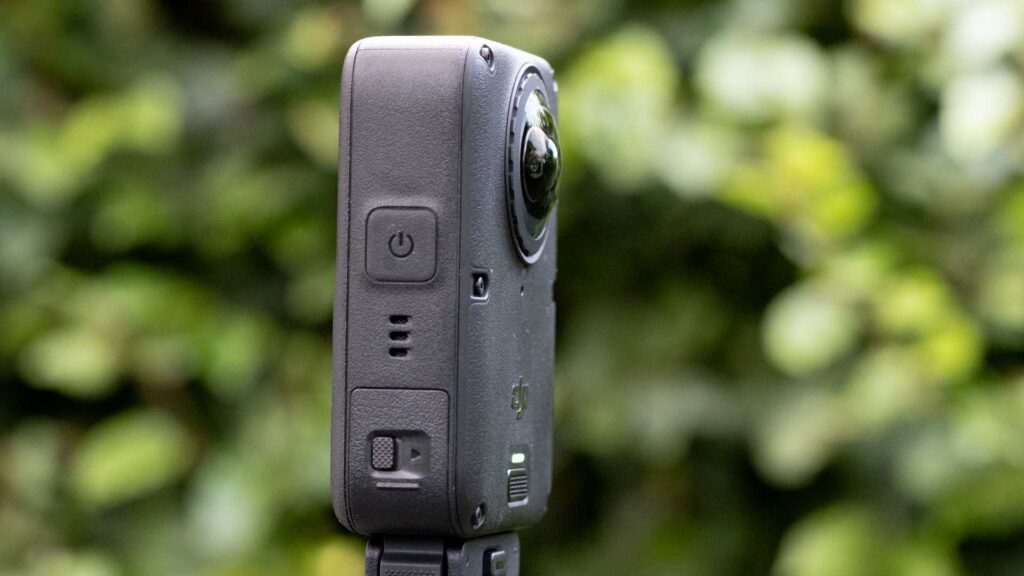
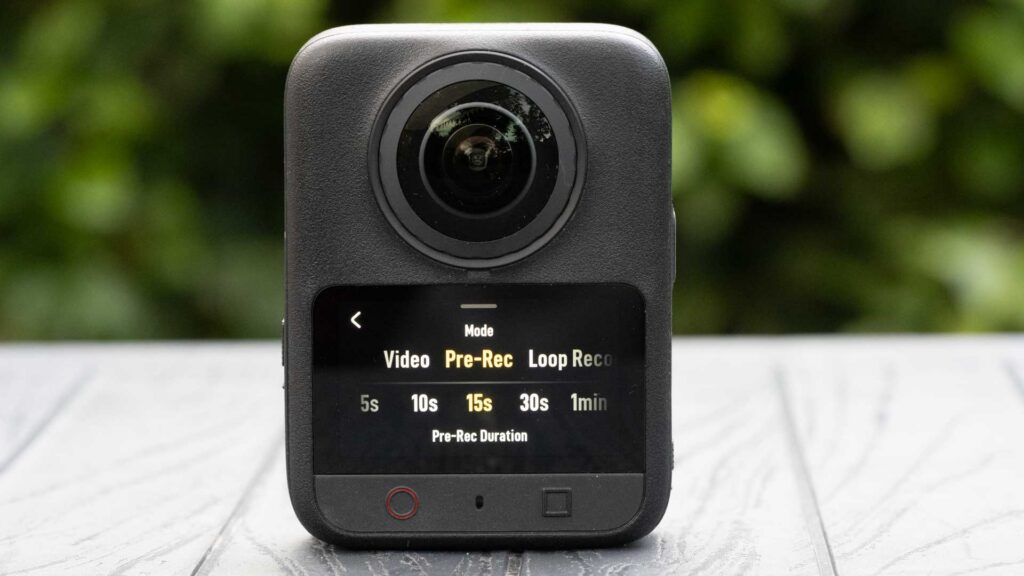
The camera’s control layout is straightforward with just three physical buttons. There’s a power/quick switch button, a shutter/record button and a function button, alongside the touchscreen. The power button turns the camera on and off, but in live view it can also be used to access the Quick Switch page and cycle through preset shooting modes. The shutter button starts and stops recording or takes a still, while the function button can be used to switch between the front and rear views or recentre the view in panoramic mode.
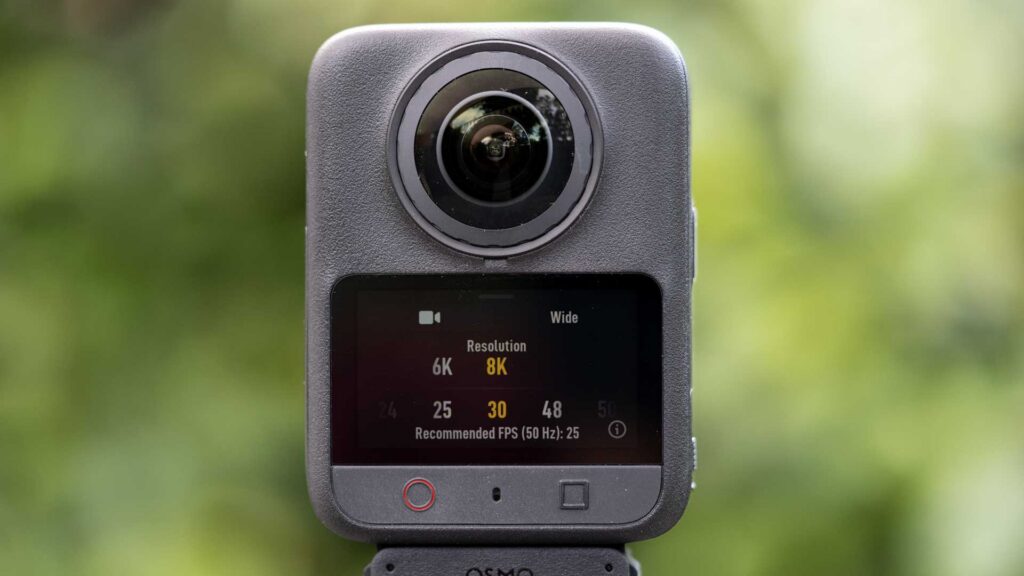
The touchscreen handles most of the deeper control. Tapping the shooting mode icon at the bottom right of the screen gives access to the different shooting modes. Once you’ve selected one, tapping the setting in the middle at the bottom of the display lets you adjust options such as the video resolution and frame rate. In stills mode, the same area gives access to settings including the pixel count and shooting countdown.
There’s also a slider icon on the right of the screen that lets you activate Pro mode. This gives you control over settings such as exposure compensation, white balance, metering mode and Film Tone.
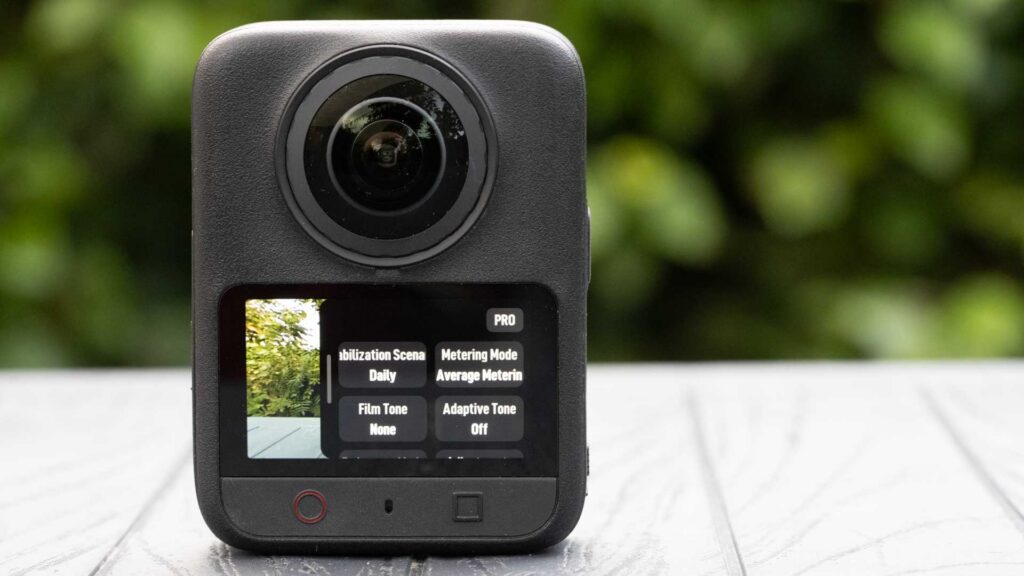
Another on-screen control lets you switch the preview between the forward-facing and backwards-facing views. Obviously, both lenses are still capturing the scene when you’re shooting in 360 mode, but being able to swap the display is useful when you’re checking what’s happening on either side of the camera.
It doesn’t take long to get used to the layout and I found it easy to locate the setting I wanted quickly. That’s important with something designed for travel and action because you don’t want to be standing around navigating menus while everyone else gets on with having fun.
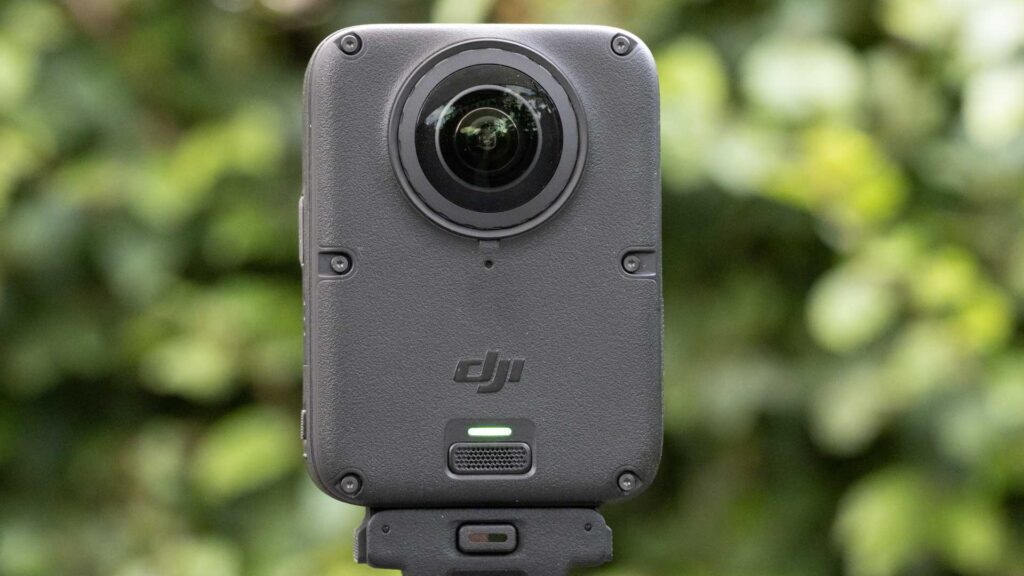
As with other 360 cameras, the lenses project prominently from the body and that makes me very aware of where I put the camera down. The Osmo 360 II’s lenses have what DJI calls a second-generation ultra-hard optical coating for improved scratch and wear resistance, but the more significant development is that they’re replaceable.
It doesn’t mean I’d become relaxed about dropping the camera or putting it down lens first, but it does make an accident less worrying. You can replace a damaged lens yourself with DJI’s Lens Replacement Kit or have it dealt with by a DJI authorised service centre.
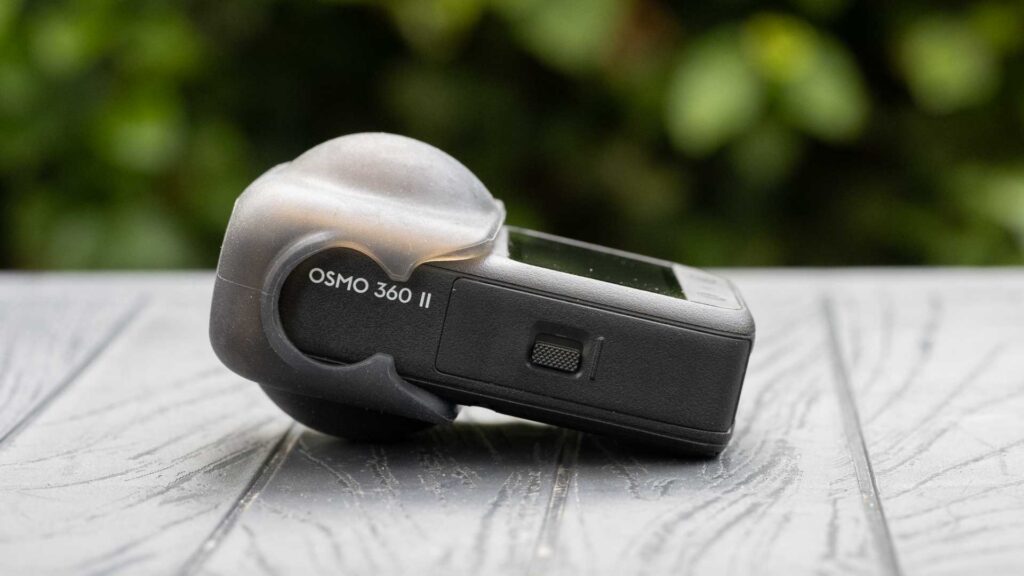
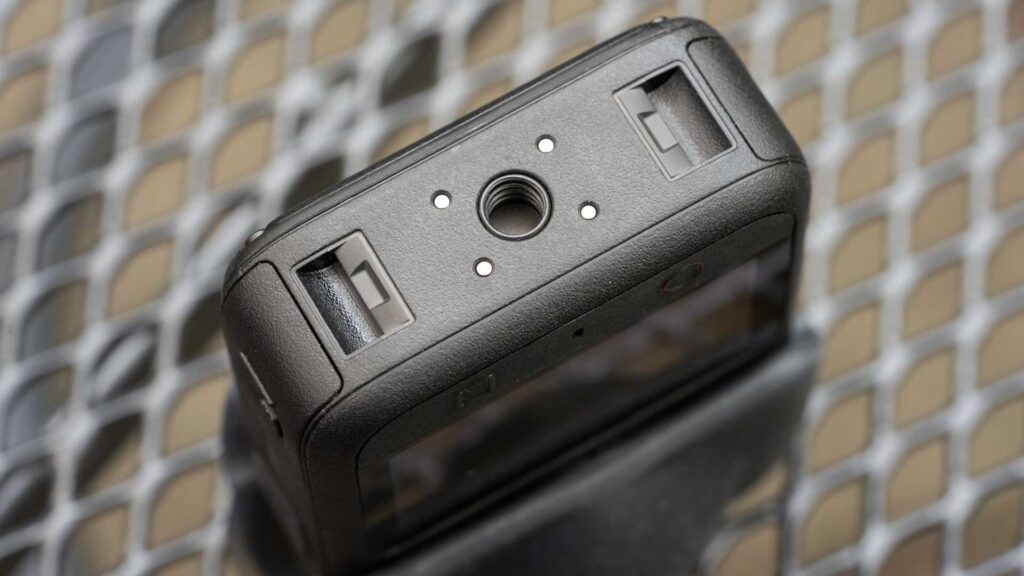
It also has a dual-direction magnetic quick-release system and a conventional 1/4-inch thread, so you can use the camera with DJI Osmo accessories or standard photographic supports. I particularly enjoyed using it on the invisible extension stick because the extra distance gives you a much more interesting perspective than simply holding the camera at arm’s length.
One of my favourite practical features is the 105GB of usable internal storage. It’s not new to the Osmo 360 II, but I’m very pleased DJI has retained it. I have a bad habit of leaving microSD cards in a drone and only realising when I’m already out with something else that also uses microSD cards, so having enough internal memory to start shooting is very reassuring. Of course, 8K 360 files are substantial, so that space isn’t limitless, but it does mean the camera isn’t immediately useless if you forget a card.
The 2150mAh battery is compatible with the Osmo Action series, which may be useful if you already have other DJI cameras and accessories.
There’s also a four-microphone array with wind noise reduction. The camera can connect directly to compatible DJI wireless microphones, including the DJI Mic 3, Mic 2, Mic Mini 2S, Mic Mini 2 and Mic Mini.
In standard video mode, the DJI Osmo 360 II produces very good-looking results. There’s a good level of detail and the main advantage of shooting in 360 becomes immediately obvious when you open the footage on a computer. Instead of being stuck with whatever direction the camera happened to be pointing, you can simply pan around the video preview in DJI Studio until you find the view you want.
It’s very intuitive. If something interesting happened behind me, I can turn the viewpoint around. If I want to cut from myself to the landscape, I can do that as well. You can even start with one view and move around the 360-degree scene as the clip progresses.
That flexibility is what makes the Osmo 360 II so useful for travel vlogs. You can walk along chatting to the camera while it’s simultaneously recording everything around you. When you come to edit, you can switch away from yourself to show the view or something happening nearby without having had to stop and point the camera at it while you were recording.
It could be equally useful on a family holiday. If you’re trying to record children or grandchildren doing what children do, you don’t necessarily have to keep them carefully framed while they’re running around. As long as they’re visible to one of the camera’s lenses, you can reframe the video afterwards to put the attention on them.
For women who are often the person behind the camera on family trips, that ability to record yourself as well as everything around you is particularly useful. You can actually be part of the footage rather than always being the unseen person recording it.
The horizon levelling is another big part of this. You don’t have to concentrate on holding the extension stick completely upright or keeping the camera level. That means you’re free to move it around and experiment with different viewpoints without ending up with a wildly tilted horizon.
I enjoyed using the Osmo 360 II on the invisible extension stick while walking our dog, Otto. I could hold it right in front of him to get a low view of him trotting towards the camera, lift it above us or move it off to one side without needing to worry too much about whether the camera itself was pointing in precisely the right direction.
There’s a slightly comic side effect to the invisible selfie stick, however. The software does a good job of making the pole disappear, but it obviously can’t do anything about the way you’re holding it. Your hand can end up looking a little odd because you’re walking along with your elbow at around 90 degrees and your fist clenched around something that isn’t visible in the final footage.
And then there’s how you look while you’re actually shooting. Carrying a long pole with a small grey rectangle on top made me feel rather like I was leading a walking tour, only somebody had forgotten to give me the usual flag or umbrella. I got the odd curious look, but the footage is much more interesting than I’d have achieved by holding an ordinary camera in front of me.
Spotlight Follow is particularly helpful once you start editing. It works well at keeping the selected subject in the centre of the frame and it can substantially reduce the amount of manual reframing required.
Initially, I thought Spotlight Follow only worked with people because it didn’t seem interested in tracking Otto. A little experimentation proved otherwise and I was able to get it to follow him as well. That’s good news because pets are exactly the sort of unpredictable subjects where being able to shoot everything and choose the framing later is useful.
The results from Pano SlowMotion mode are a little more mixed. By default, the camera goes to 4K 8x slow motion at 240 frames per second. This can produce disappointing results, with fine detail looking rather smudgy. The problem is more obvious in low light when the camera has to push the ISO sensitivity upwards.
Dropping to 4K 4x slow motion at 100 frames per second produces much better-looking results. In reality, 4x slow motion is enough for plenty of situations anyway. It slows the action down dramatically without demanding quite so much from the camera and, based on my shooting, it’s the setting I’d be more inclined to use.
The difference is a useful reminder that the highest setting isn’t automatically the best one. If you have plenty of light and really need 8x slow motion, it’s there, but I’d rather have cleaner-looking 4x footage in many situations.
The built-in microphones also do a good job with ambient sound, almost too good at times. On one walk they picked up the trudge and slap of my trainers on the ground with rather more enthusiasm than I would have liked.
Voice recording is reasonably good too, although naturally that depends on how far the camera is from you. That’s an important consideration with a 360 camera because you often want the camera further away from you on an extension stick to get the best viewpoint.
Fortunately, the Osmo 360 II is compatible with DJI’s wireless microphones, including the Mic Mini 2 and Mic Mini 2S. That means you can have the microphone close to your mouth while the camera is further away, which is a much better arrangement for vlogging. You can take advantage of the more interesting 360 viewpoints without your voice becoming distant or being overwhelmed by the surrounding sounds.
More generally, the Osmo 360 II highlights both the joy and the mild frustration of shooting in 360. At the shooting stage, it’s wonderfully freeing. You don’t have to keep aiming the camera or worry that you’ve missed something happening just outside the frame. But you pay some of that time back in the edit because you’ve then got to decide what you actually want the viewer to see.
DJI Studio makes that process straightforward and Spotlight Follow eases a fair amount of the pain. I wouldn’t say 360 footage is as quick to deal with as a conventional clip that’s already framed exactly as you want it, but the software does a good job of making the extra flexibility manageable. I was able to edit short clips in just a few minutes, using keyframes to mark the transition point from one framing to another.
This video was shot on the DJI Osmo 360 II in 4K 8X slow motion mode. I edited it using DJI Studio on a desktop computer.
This video was shot using the DJI Osmo 360 II in 4K 8x slow-motion, with tracking assigned to the dog’s face when editing in DJI Studio on a desktop computer.
The DJI Osmo 360 II is a useful update to the original model, with 8K/60p video, user-replaceable lenses and effective subject tracking among its strongest features. Standard 360 footage looks very good and DJI Studio makes reframing straightforward, while Spotlight Follow helps reduce some of the extra editing that comes with shooting in 360.
I also like the freedom of being able to capture everything around me and choose the viewpoint later, especially for travel, family trips and walking with Otto. The 105GB of internal storage remains very useful, while the main compromise is that 360 footage still needs more work in the edit than conventional video and the 4K 8x slow motion can look rather smudgy, particularly in lower light.
Overall, the Osmo 360 II is an enjoyable and flexible camera to use. The replaceable lenses make it feel more practical for real world use and the combination of good image quality, easy reframing and useful tracking features makes it a strong option for anyone who wants to capture an experience first and worry about the framing afterwards.
I’ve used GoPro HERO Black cameras to record all sorts of adventures and I love the DJI Osmo Pocket series, especially the Pocket 4P, but the Osmo 360 II has jumped straight to the top of my list of fun video cameras. It encourages me to shoot in situations where another camera might feel like a bit of a pain and it sparks ideas for interesting angles and viewpoints. It’s certainly a camera I want to take on holiday, especially on a skiing trip.