
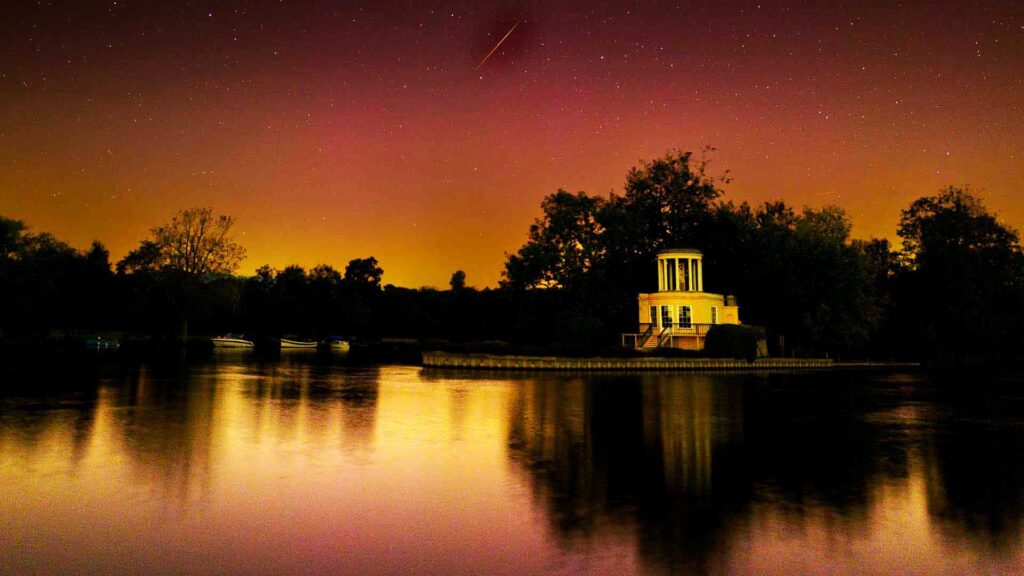
The Perseid meteor shower is one of the highlights of the night sky calendar and photographing it can be great fun. However, meteors appear without warning and only last for a moment, so you need to get your camera set up and ready before they start to appear.
The good news is that you don’t need lots of specialist equipment. A DSLR or mirrorless camera, a wide-angle lens and a sturdy tripod are the main essentials. An intervalometer, either external or built into your camera, is also a very useful addition. Once everything is set up, you can let your camera shoot automatically while you enjoy watching the sky.
A few extras can make the experience much more comfortable. I like to take a comfortable camping chair, a few snacks and something to drink. And even though the Perseids appear in July and August, it can turn surprisingly chilly in the dead of night, so pack an extra layer. It’s also worth taking something to keep the midges at bay as they can be a real nuisance on August nights in the UK.
A torch is handy too, and a headtorch is even better because it keeps your hands free. If you have one with a red light, so much the better, as red light is less damaging to your night vision. However, remember that any light you shine into the scene while the shutter is open can affect your images, so take care where you point it while the camera is shooting.
The first step is to find somewhere with as little light pollution as possible. A darker sky makes it easier to see the stars and gives you a better chance of recording the fainter meteors.
Think about what will be in the foreground too. A tree, building, hill or interesting skyline can add context and scale to the image and often makes for a more interesting photograph than a frame filled with sky.
If possible, arrive while there is still some daylight so you have time to look around, choose your viewpoint and work out your composition before it gets dark.
A short focal length lens gives you a wide field of view, which increases your chances of capturing a meteor as it streaks across the sky.
Something between around 10mm and 24mm on a full-frame camera works well. On an APS-C format camera, look for something around 16mm or wider, while 12mm or wider is a good option for Micro Four Thirds.
Wide-angle lenses also give you plenty of depth of field, especially when they are focused on a distant subject or close to infinity. This means you can use a large aperture to let plenty of light reach the sensor without having to push the ISO too high.
Wide-angle prime lenses tend to have a larger maximum aperture than zoom lenses, which makes them particularly useful for photographing the night sky. In most situations you’ll want to use the lens at or close to its widest aperture so it lets in as much light as possible. A lens with a maximum aperture of f/1.4 or f/1.8 is especially useful, but don’t worry if your lens isn’t quite that fast.
Getting the exposure right is a bit of a juggling act, and it’s important to shoot in manual exposure mode so you’re in full control of what your camera is doing. Shooting raw files also ensures that your camera captures the maximum amount of information, giving you more flexibility with any post-capture editing that’s needed.
You don’t want to set the ISO too high because noise can start to make the sky look messy and obscure some of the fainter stars. Equally, you don’t want to use a shutter speed that is too long because the movement of the stars will become visible and they will start to look like short streaks rather than points of light.
I find a shutter speed of around 4 or 5 seconds works well as a starting point. Set a wide aperture, then adjust the ISO to give you the exposure you need.
Take a few test shots before you start shooting your sequence and check them carefully. Your camera’s histogram can help you judge the exposure, but remember that much of the scene should be dark, so you should expect the histogram to be weighted towards the left. Pay particular attention to any illuminated buildings or other bright areas and make sure they aren’t burnt out.
Autofocus systems can struggle in very low light, so manual focusing is usually the better option, but you may find a bright area that allows your camera’s AF system to do the job.
Focus your lens on a distant object or close to infinity. If your camera allows you to magnify the live view image, use a bright star or distant light to check that the focus is as accurate as possible.
Once you are happy with the focus, leave the lens set to manual focus so the camera doesn’t try to refocus between shots.
Perseid meteors appear as short-lived streaks of light across the sky and there’s no way of predicting exactly when or where one will appear. Consequently, you’re unlikely to capture the shots you want by trying to press the shutter button when you see a meteor.
Instead, set your camera to take a continuous sequence of moderately-long exposures. This is where an intervalometer (or interval timer) is especially useful. Most can be set to take pictures continuously for a set period of time or for a certain number of shots. Some cameras have this function built in, so it’s worth checking your camera’s menu before buying an external intervalometer.
Once you have composed the shot, focused the lens and checked the exposure, start the shooting sequence and let the camera get on with it.
Then you can sit back, watch the sky and enjoy the meteor shower rather than spending the whole night pressing the shutter button or looking at the back of your camera.
When you look through your photographs afterwards, you may spot a few streaks of light that you didn’t notice while you were shooting.
A meteor appears and disappears very quickly, so you will usually only see its trail in one image. If a streak continues across several consecutive frames, it is most likely an aeroplane or satellite rather than a meteor.
You only need a few key pieces of kit:
Once everything is set up, the key is to keep shooting. You will probably end up with plenty of frames that contain nothing but stars, but that’s all part of photographing a meteor shower. The more images you take, the better your chances of capturing a Perseid streaking across the frame.